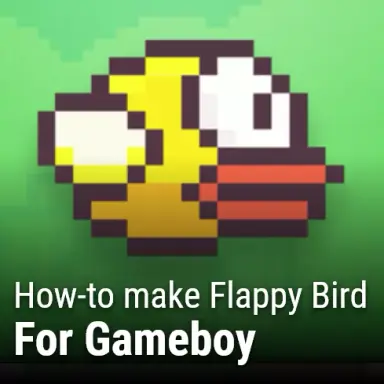
Flappy Bird was a popular hyper casual mobile game released in 2013 by Vietnamese video game artist and programmer Dong Nguyen. Flappy Bird is a simple side-scrolling game where the player controls a yellow bird. The objective is to fly as far as possible. During such, random set’s of green pipes will attempt to obstruct your path. In addition, Flappy Bird has a single button control screen. The player must tap the screen to make the bird flap it’s wings. Flappy Bird was eventually removed from app stores by request of it’s creator. However, many clones have been made in it’s absence.
In this tutorial, you will learn how to make flappy bird for gameboy. If you are not yet familiar with gameboy game development via GBDK 2020, please refer to my tutorial series on How to make a Gameboy Game. You can watch a live demo of the final product on my YouTube Channel here.
Pre-requisites
There are only 2 requirements for this tutorial. You need to know how to program in C/C++, and you need a computer. If you want to learn how to program in C, there are many free YouTube tutorials (maybe the Junkyard will create one someday). In addition, there are tons of books on it like this one.
The GBKD 2020 Docs has a section for Basic C programming tutorials here: https://gbdk-2020.github.io/gbdk-2020/docs/api/docs_coding_guidelines.html#docs_c_tutorials
What is included? What is NOT included?
The final product of the tutorial will not be a 1-for-1 mirror of the original flappy bird. However, many of the original game’s features will be present. With the exception of In-game advertisements
What IS included:
- Score Counter
- Parallax Scrolling Backgrounds
- Rotating Bird based on velocity
- End Game Scoreboard w/ High Score and Medals
- One-button control scheme
- Pre-gameplay “tap to start” game state w/ title
- Graphics – Bird, Pipes, and Background
- Basic Sounds – Fly, Score Increase, and Death
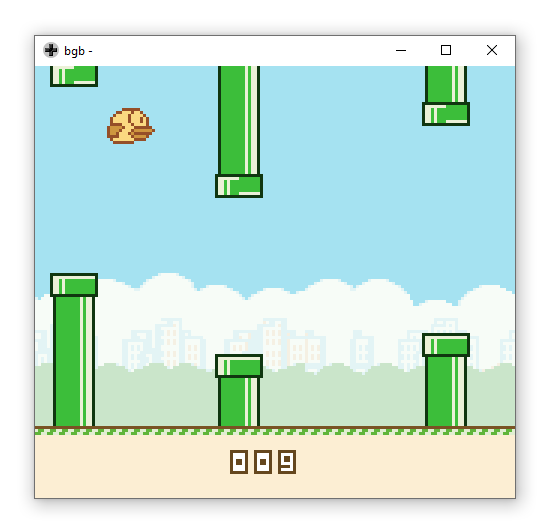
Our final output should look like this:
How to make Flappy Bird
To simplify things for readers, i have created a starter repository. This repository contains everything you need to get started with the tutorial, including:
- .c and .h files for all graphics
- .c and .h files pre-created for our game’s logic
- A make.bat to compile your .gb file.
- #include’s set for included files
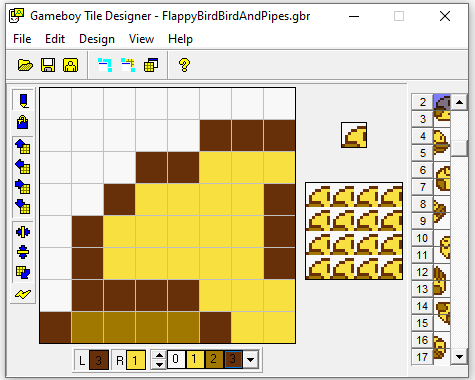
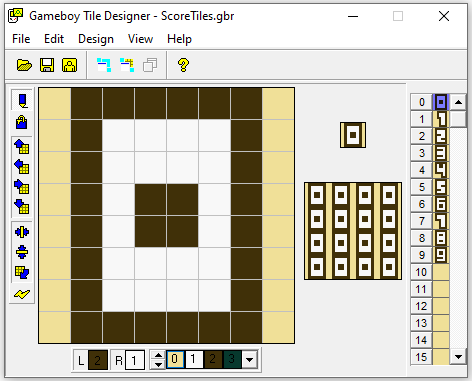
- GBTD .gbr Files for the ground, score, and bird
- Aseprite files used also
This tutorial requires GDK 2020 is installed on the computer. Check our our tutorial on that here. Once installed, you may need to update the make.bat to point to where it’s at.
Here is the starter repository. I hope you enjoy the tutorial. If you want to just see the final product, check out this repository!
Our Entry Point
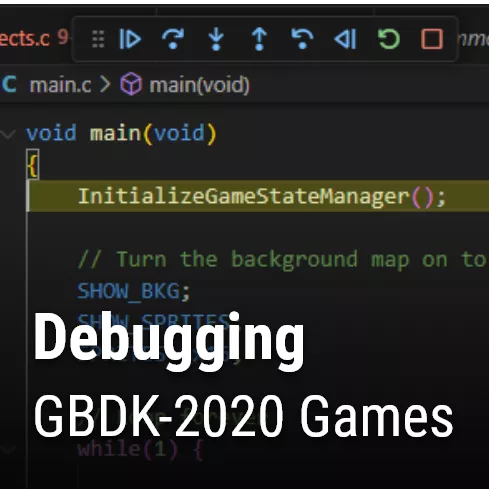
A game’s entry point is where everything begins. In our case, what the gameboy hardware is going to run when the cartridge is inserted. Our game’s entry point (the “main” function) lies in our main.c file. In this file we are going to handle our game loop and game state management.
void main(void){
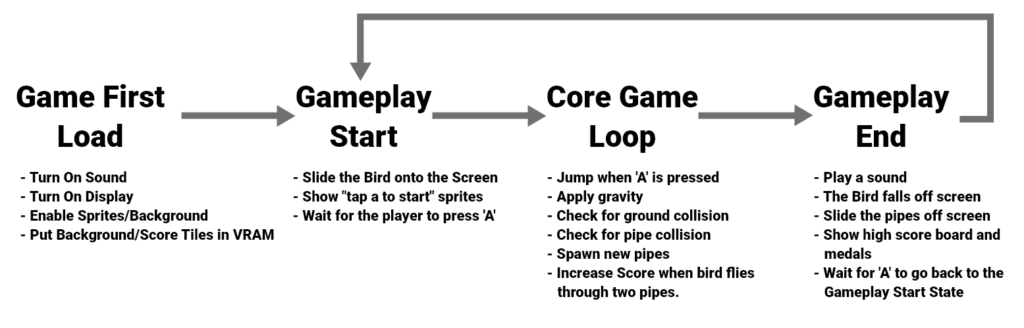
}Before we get into game state management there is somethings we need to do. Specifically, turn on the display, enable the background & sprites, enable sound, and populate VRAM with some tiles. All of this will be done in a function called “GameFirstLoad”. This function will be called at the beginning of our main function. We’ll create this function in the next section, once we are finished with our main.c file.
void main(void){
    GameFirstLoad();
}
Our Game will have 3 game states. Gameplay Start, The Core Game Loop, and The Gameplay End. We need to create two variables to represent our current and next game state. We will default them to GAMEFIRSTLOAD and GAMEPLAYSTART respectively. These are macros that we will define in Common.c later.
void main(void){

    ... Code from previous step(s)

    uint8_t currentGameState=GAMEFIRSTLOAD;
    uint8_t nextGameState=GAMEPLAYSTART;
}
Our Entry Point
A game’s entry point is where everything begins. In our case, what the gameboy hardware is going to run when the cartridge is inserted. Our game’s entry point (the “main” function) lies in our main.c file. In this file we are going to handle our game loop and game state management.
void main(void){
}
Before we get into game state management there is somethings we need to do. Specifically, turn on the display, enable the background & sprites, enable sound, and populate VRAM with some tiles. All of this will be done in a function called “GameFirstLoad”. This function will be called at the beginning of our main function. We’ll create this function in the next section, once we are finished with our main.c file.
void main(void){
    GameFirstLoad();
}
Our Game will have 3 game states. Gameplay Start, The Core Game Loop, and The Gameplay End. We need to create two variables to represent our current and next game state. We will default them to GAMEFIRSTLOAD and GAMEPLAYSTART respectively. These are macros that we will define in Common.c later.
void main(void){

    ... Code from previous step(s)

    uint8_t currentGameState=GAMEFIRSTLOAD;
    uint8_t nextGameState=GAMEPLAYSTART;
}
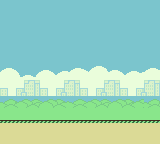
With VRAM setup for our background and score, we’ll display our background image.
void GameFirstLoad(){

    ... Code from previous steps

    /////////////////////////
    // Draw our background //
    /////////////////////////

    VBK_REG = 1;
    set_bkg_tiles(0,0,32,18,FlappyBirdBackground_map_attributes);
    VBK_REG = 0;
    set_bkg_tiles(0,0,32,18,FlappyBirdBackground_map);
}
That’s it for our “GameFirstLoad” function. Above we added an LCD interrupt that will achieve parallax scrolling. That interrupt would invoke a function named “HandleBackgroundScrolling”. Here is what that function should be. This should be placed above the “GameFirstLoad” function.
void HandleBackgroundScrolling(){
// If the gameboy is drawing line 0 (the top of the screen)
if(LYC_REG==0){
// The interrupt should next trigger at line 63
LYC_REG=63;
// Move everything below on the background (until our next interrupt at 63) back to the starting position
move_bkg(0,0);
// Re-show sprites
SHOW_SPRITES;
// if the gameboy is drawing line 63
}else if(LYC_REG==63){
// The interrupt should next trigger at line 79
LYC_REG=79;
// Move everything below on the background (until our next interrupt at 79) according to this variable
move_bkg(topBackgroundScroll,0);
// if the gameboy is drawing line 79
}else if(LYC_REG==79){
// The interrupt should next trigger at line 95
LYC_REG=95;
// Move everything below on the background (until our next interrupt at 95) according to this variable
move_bkg(midBackgroundScroll,0);
// if the gameboy is drawing line 95
}else if(LYC_REG==95){
// The interrupt should next trigger at line 119
LYC_REG=119;
// Move everything below on the background (until our next interrupt at 119) according to this variable
move_bkg(lowBackgroundScroll,0);
// if the gameboy is drawing line 119
}else if(LYC_REG==119){
// The interrupt should next trigger at line 125
LYC_REG=125;
// Move everything below on the background (until our next interrupt at 125) according to this variable
move_bkg(floorBackgroundScroll,0);
// if the gameboy is drawing line 125
}else if(LYC_REG==125){
// The interrupt should next trigger at line 0
LYC_REG=0;
// Move everything below on the background (until our next interrupt at 0) back to the starting position
move_bkg(0,0);
// Prevent pipes from overlapping
HIDE_SPRITES;
}
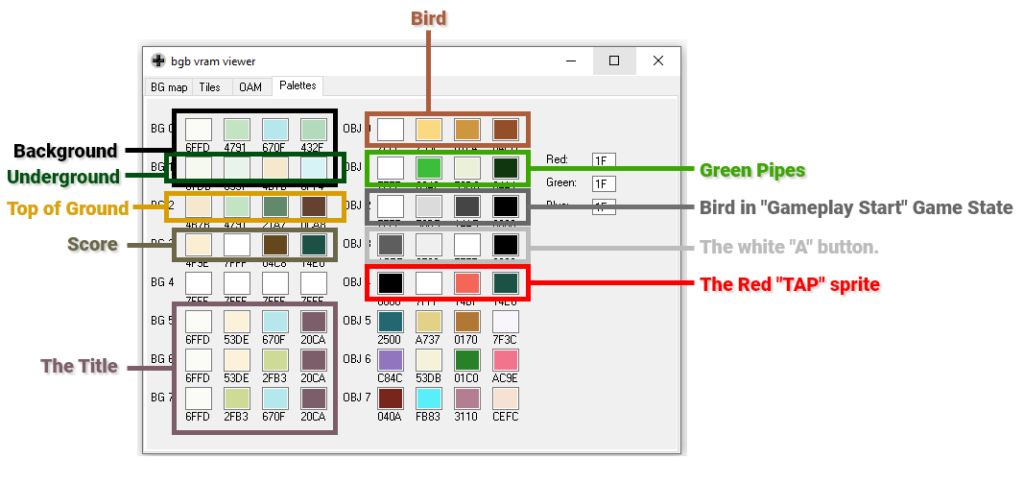
}If properly done, when you compile and run your gameboy .gb file, you should see a simple background. If you load up a VRAM viewer, you’ll notice all of the background and score tile data in VRAM.

Gameplay Start – Sliding the Bird into view
In this section we are going finally show the bird. Our Gameplay Start State’s Setup function, “GameplayStartSetup”, will be called after the game first loads, and after each player death. So we need to make sure VRAM and all necessary variables are in a proper state. Firstly, we are going to move all the sprites reserved for the green pipes off screen. We are also going to assign their palette.
void GameplayStartSetup(){

    // Clear up sprites for usage
    // Move all non-player sprites to large number
    // So our logic later tracks them as 'unused' (x > 176)
    // Also set their palette
    for(uint8_t i=2;i<40;i++){
        move_sprite(i,250,0);
        set_sprite_prop(i,1);
    }
}
Next we are going to put into VRAM our sprites for the “tap a to start” guide.

// Move the bird vertically based on birdVelocityY
// Set the bird as not alive if too low
// Choose the proper sprite for our bird
// Gameboy doesn't support rotation of sprites
// Thus we have extra sprites for different rotation states
void MoveAndUpdateFlappyBird(){

    // our bird's default state is tile 2
    uint8_t tile=2;

    // Apply velocity
    birdY+=birdVelocityY/5;

    // Avoid going TOO low
    if(birdY>106){
        alive=0;
    }

    // use a different tile based on our y velocity
    if(birdVelocityY>10)tile=14;
    if(birdVelocityY>18)tile=18;
    if(birdVelocityY<-5)tile=6;

    // Set the proper tile for our bird
    set_sprite_tile(0,tile);
    set_sprite_tile(1,tile+2);

    move_sprite(0,birdX+8,birdY+16);
    move_sprite(1,birdX+8+8,birdY+16);
}
Common – Update Score Text At
Our “UpdateScoreTextAt” function will be used to update the score on the background. This function is going to use division and the modulo operator (%) to set the proper tiles for score display. The modulo operator is the remainder after division. For a more in-depth explanation, check out this stack overflow post.
We previously put the tiles for score immediately after the background in VRAM. We set the color palette the score tiles use in slot 3. The “UpdateScoreTextAt” function wil set 3 tiles at a time (horizontally)
void UpdateScoreTextAt(uint8_t x, uint8_t y,uint16_t scoreToDisplay){

    unsigned char scorePlane1[] = {0x03,0x03,0x03};
    unsigned char scoreText[] = {0,0,0};

    // The score tiles start immediately after the background tiles
    scoreText[0]=(scoreToDisplay/100)%10+FlappyBirdBackground_TILE_COUNT;
    scoreText[1]=(scoreToDisplay/10)%10+FlappyBirdBackground_TILE_COUNT;
    scoreText[2]=scoreToDisplay%10+FlappyBirdBackground_TILE_COUNT;

    VBK_REG = 1;
    set_bkg_tiles(x,y,3,1,scorePlane1);

    VBK_REG = 0;
    set_bkg_tiles(x,y,3,1,scoreText);
}
Like in previous scenarios, we can’t forget to declare this function in our header file.
void UpdateScoreTextAt(uint8_t x, uint8_t y,uint16_t scoreToDisplay);Utiltity Functions
In our spawn pipes function we used a “RandomNumber” function, and a “GetAvailableSprite” function. These are not builtin, we’ll define them now in our Utilities.c file.
The “RandomNumber” function returns a pseduo random value. The code is going to get the value at 0xFF04 in memory, and clamp that value between the minimum and maximum values specified. The register at 0xFF04 changes freqeuntly, so it will suffice for a random number generator.
The “GetAvailableSprite” function simply returns the first sprite with an x value less than 200. When we spawn pipes, their x positions are less than 200. If a spawned pipe’s x position is greater than 200, then it has went of the left side of the screen and looped back around (due to it’s x coordinate being a uint8_t)
uint8_t RandomNumber(uint8_t min, uint8_t max){
    unsigned char *ptr_div_reg = 0xFF04;
    return min+(*(ptr_div_reg) % (max-min));    // get value at memory address
}

uint8_t GetAvailableSprite(){
    for(uint8_t i=2;i<40;i++){
        OAM_item_t * itm = &shadow_OAM[i];
        if(itm->x>=200)return i;
    }
    return 0;
}
Our CoreGameLoop game state will be finished once we decalre these two functions in their respective header file.
uint8_t RandomNumber(uint8_t min, uint8_t max);
uint8_t GetAvailableSprite();
At this point in time, you should have a working game. Next we are going to wrap things up, and handle when the bird dies.
Gameplay End
At this point in time, our bird has hit a pipe. We want the bird to fall off screen, and then we want the pipes to scroll offscreen. After the screen has been cleared of the bird and pipes, we’ll show the scoreboard. After the player presses A again, can go back to the Gameplay Start game state. Our Scoreboard will show the current score, the high score, and the medal earned.
- Bronze – 10+ points
- Silver – 20+ points
- Gold – 30+ Points
- Platinum – 40+ points
Our setup function for this game state will also be very minimal. In our Setup function, now that bird has died, we are going to play a sound to tell the player. We’ll also default the value of a helper variable, “areShowingGameplayEndBoard” to 0.
uint8_t areShowingGameplayEndBoard=0;

void GameplayEndSetup(){

    // Play a noise
    NR10_REG=0x7C;
    NR11_REG=0x41;
    NR12_REG=0x73;
    NR13_REG=0x73;
    NR14_REG=0x86;

    areShowingGameplayEndBoard=0;
}
In our update function, if we are not showing the high score board, we check if the bird’s y is low enough on screen. We will scroll pipes at normal speed until the bird is offscreen, then we will scroll pipes off screen faster.
Our “ScrollSpritesForPipes” doesn’t affect the bird, so we’ll manually move it to the left one pixel each update.
uint8_t GameplayEndUpdate(){


    uint8_t numberOfInUseSprites=2;

    if(areShowingGameplayEndBoard==0){

        // Scroll the pipes faster when the bird is fully offscreen
        if(birdY>=176)numberOfInUseSprites=ScrollSpritesForPipes(4);
        else numberOfInUseSprites=ScrollSpritesForPipes(1);
    }

    // Move our bird to the left along with our scrolling pipes
    birdX-=1;
}
This is the second-to-last code snippet of this tutorial. To wrap up the gameplay end game state’s update function we need to:
- Move and update the flappy bird until it’s offscreen.
- Show the game end board when the bird is offscreen and no pipes remain
- Wait for the A button to be pressed, so we can go back to the gameplay start state.
uint8_t GameplayEndUpdate(){

    ... Code from previous step

    // While the player's y isn't really large
    // We're going to make the player fall off screen
    // Eventually the player will physically reach below (greater than) 176 and the loop will stop
    if(birdY<176){

        MoveAndUpdateFlappyBird();

    // If the bird is far off screen, let's scroll in use sprites until none are on screen.
    }else if(areShowingGameplayEndBoard==0 && numberOfInUseSprites==2){

        areShowingGameplayEndBoard=1;

        ShowGameplayEndBoard();

    }else{

        if((joypadCurrent & J_A) && !(joypadPrevious & J_A)){
            return GAMEPLAYSTART;
        }
    }

    return GAMEPLAYEND;
}
Here is our “ShowGameplayEndBoard” function. This should be defined above our “GameplayEndUpdate” function. This function draws the high score board on the background. This is one of thereasons in our “GamelayStartSetup” function we need the “ClearTopSky” function.
// This function will cover showing our high score board.
// Here's everything it will do:
// - Cover the score on the bottom of the background
// - Show the high score board on the background
// - Score the score and high score
// - Conditionally show the medal earned.
void ShowGameplayEndBoard(){

    ////////////////////////////////////////////////////////
    // Cover up the score at the bottom of the background //
    ////////////////////////////////////////////////////////

    unsigned char coverScoreTiles[3]={0,0,0};

    VBK_REG = 1;
    get_bkg_tiles(0,17,3,1,coverScoreTiles);
    set_bkg_tiles(8,16,3,1,coverScoreTiles);
    VBK_REG = 0;
    get_bkg_tiles(0,17,3,1,coverScoreTiles);
    set_bkg_tiles(8,16,3,1,coverScoreTiles);

    ///////////////////////////////
    // Show our high score board //
    ///////////////////////////////

    unsigned char FlappyBirdEnd_map_offset2[98];
    unsigned char FlappyBirdEnd_map_offset[98];

    // Our gameplay end board expects to have it's tiles & palettes at the start of VRAM
    // Because this is not the case, we need to use 2 helper arrays to offset these values
    // The color palettes should start at 5
    // The tiles should be after the background & scores tiles.
    for(uint8_t i=0;i<98;i++){
        FlappyBirdEnd_map_offset2[i]=FlappyBirdEnd_map_attributes[i]+5;
        FlappyBirdEnd_map_offset[i]=FlappyBirdEnd_map[i]+FlappyBirdBackground_TILE_COUNT+ScoreTilesLen;
    }

    set_bkg_data(FlappyBirdBackground_TILE_COUNT+ScoreTilesLen,FlappyBirdEnd_TILE_COUNT,FlappyBirdEnd_tiles);
    set_bkg_palette(5,2,FlappyBirdEnd_palettes);

    VBK_REG = 1;
    set_bkg_tiles(3,1,14,7,FlappyBirdEnd_map_offset2);
    VBK_REG = 0;
    set_bkg_tiles(3,1,14,7,FlappyBirdEnd_map_offset);

    /////////////////////////////////////////////
    // Draw our scores on the high score board //
    /////////////////////////////////////////////

    UpdateScoreTextAt(13,3,score);
    UpdateScoreTextAt(13,6,highScore);

    ///////////////////////////////////////////////////
    // Show our medal if we have more than 10 points //
    ///////////////////////////////////////////////////

    if(score>10){

        set_sprite_data(24,64,FlappyBirdMedals_tiles);
        set_sprite_palette(0,3,FlappyBirdMedals_palettes);

        uint8_t medal = 0;

        if(score>20)medal=1;
        if(score>30)medal=2;
        if(score>40)medal=3;

        // inline uint8_t move_metasprite(const metasprite_t * metasprite, uint8_t base_tile, uint8_t base_sprite, uint8_t x, uint8_t y) {
        move_metasprite(FlappyBirdMedals_metasprites[medal],24,2,60,61);

    }
}
Conclusion
That’s it! Our games done. Feel free to compile the .gb file and run it in an emulator. You can double check your code against my finished version in this github repository.