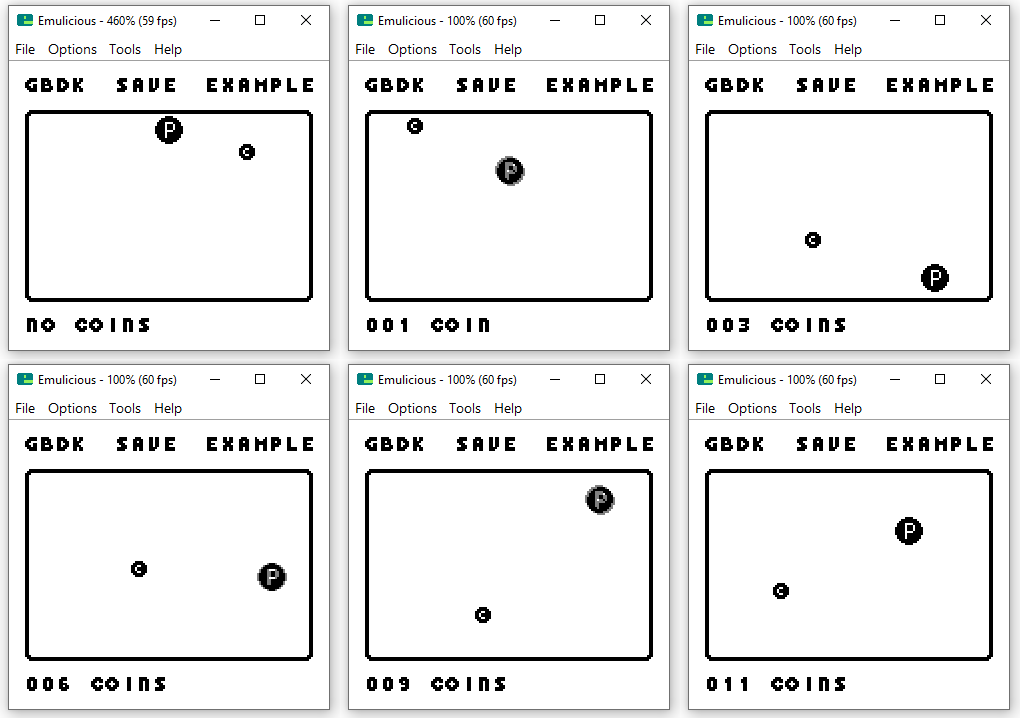
By default no data is saved in game boy games. When you turn your Game Boy off, all data in RAM is lost. we can change that by storing data on the cartridge in SRAM or FRAM. SRAM stands for “Static Random-Access Memory”, and FRAM stands for “Ferroelectric Random-Access Memory”. Both can persist data when the Game is no longer being played. If you’re running on an emulator, you’ll see a .sav file created with your games’ data.
NOTE: SRAM requires a continuous power source, where FRAM does not. Besides that, there is no difference between using SRAM or FRAM (code-wise)
You can find an example repo here: How to Save Data GitHub Repo. In this repo, you’ll see a basic coin collecting demo. Move the circle player sprite, to collect the coins. Everytime you collect a coin, the position of the coin and player are saved. If you close the game and re-open it, everything will be the the same.

Cartridge Capabilities
The first thing, you need to make sure you compile your Game Boy game for the right cartridge type. Each cartridge type has a special hex code. You’ll pass this code with the ‘-Wl-yt<hex-code‘ argument. Here is a table for cartridge types and their info.
| Hex Code | MBC Type | SRAM | Battery | RTC | Rumble | Extra | Max ROM Size (1) |
|---|---|---|---|---|---|---|---|
| 2 | MBC-1 (2) | SRAM | 2 MB | ||||
| 3 | MBC-1 (2) | SRAM | BATTERY | 2 MB | |||
| 8 | ROM (3) | SRAM | 32 K | ||||
| 9 | ROM (3) | SRAM | BATTERY | 32 K | |||
| C | MMM01 | SRAM | 8 MB / N | ||||
| D | MMM01 | SRAM | BATTERY | 8 MB / N | |||
| 10 | MBC-3 (4) | SRAM | BATTERY | RTC | 2 MB | ||
| 12 | MBC-3 (4) | SRAM | 2 MB | ||||
| 13 | MBC-3 (4) | SRAM | BATTERY | 2 MB | |||
| 1A | MBC-5 | SRAM | 8 MB | ||||
| 1B | MBC-5 | SRAM | BATTERY | 8 MB | |||
| 1D | MBC-5 | SRAM | RUMBLE | 8 MB | |||
| 1E | MBC-5 | SRAM | BATTERY | RUMBLE | 8 MB | ||
| 22 | MBC-7 | SRAM | BATTERY | RUMBLE | SENSOR | 2MB | |
| FF | HuC1 | SRAM | BATTERY | IR | To Do |
This table is from the GBDK 2020 docs, some rows have been omitted. You can view all of the cartridge types here: ROM/RAM Banking and MBCs – MBC Type Chart.
Here are some examples how you would use the hex code:
# Using cartridge type: 3 (MBC1,  SRAM, BATTERY, 2MB MAX SIZE)
/path/to/gbdk/bin/lcc -Wm-yt3 -o MyGameBoyGame main.c saved-data.o

# Using cartridge type: 1B (MBC5, SRAM, BATTERY, 8MB MAX SIZE)
/path/to/gbdk/bin/lcc -Wm-yt1B -o MyGameBoyGame main.c saved-data.o
Defining our saved data
With GBDK, you cannot randomly save whatever you want. You need define our FRAM/SRAM values in a .c file first. For example, in the example project, we have this in ‘saved-data.c‘:
#include <gb/gb.h>

// Has our game been saved
uint16_t savedCheckFlag1;

// The location of the player
int16_t savedPlayerX, savedPlayerY;

// The state of our coin
int16_t savedCoinX,savedCoinY;
uint8_t savedCoinCount;
Ideally, you should try to minimize the amount of data saved. Resist the urge to save EVERYTHING. Data that’s already in the Cartridge’s ROM doesn’t need to be saved. Additionally, Values that can be calculated easily also do not need to be saved.
Once we’ve defined our save data. This file must be compiled with the lcc -Wf-ba<N> argument. Where ‘<N>’ is the RAM bank you want to put the data in. Here’s an example:
# This creates a 'saved-data.o' file in the 'obj' folder
obj/saved-data.o: saved-data.c
	$(LCC) $(LCCFLAGS) -Wf-ba0 -c -o obj/saved-data.o saved-data.c
In our makefile, We’ll pass that compiled .o file along when creating our Game Boy ROM.
# This creates our .gb file
$(BINS):	$(CSOURCES) obj/saved-data.o
	$(LCC) $(LCCFLAGS) -Wm-yt3 -Wm-yoA -Wm-ya1 -o HowToSaveData.gb $(CSOURCES) obj/saved-data.o
Other .c files will need to know of the existence of our SRAM/FRAM variables. We’ll create a matching header file to, saved_data.h:
#ifndef SAVED_DATA_HEADER
#define SAVED_DATA_HEADER

#include <gb/gb.h>

extern uint16_t savedCheckFlag1;
extern int16_t savedPlayerX, savedPlayerY, savedCoinX,savedCoinY;
extern uint8_t savedCoinCount;


#endif
Accessing our data
Other .c files can now include the previous saved_data.h file to be aware of those variables’ existence. However, to actually read/write there values we have one more step. Access to those variables is disabled by default. We can enable access with one easy line ‘ENABLE_RAM‘
ENABLE_RAM;We can now easily read from, or write to our SRAM/FRAM variables. With access to our SRAM/FRAM variables enabled, we can treat them like normal RAM variables. When done writing to these variables, we’ll call the matching ‘DISABLE_RAM‘. In our main.c file:
void LoadSaveData(void){

    ENABLE_RAM;

    /**
     * @brief Copy values from the cartridge's FRAM/SRAM into the normal on-device RAM
     */
    playerX = savedPlayerX;
    playerY = savedPlayerY;
    coinX = savedCoinX;
    coinY = savedCoinY;
    coinCount = savedCoinCount;

    DISABLE_RAM;
}

void SaveData(void){

    ENABLE_RAM;


    /**
     * @brief Copy values from the normal on-device RAM to the cartridge's FRAM/SRAM. We make sure
     * to set the savedCheckFlag1 variable, so we know that valid data exists.
     */
    savedCheckFlag1=12345;
    savedPlayerX=playerX;
    savedPlayerY=playerY;
    savedCoinX=coinX;
    savedCoinY=coinY;
    savedCoinCount=coinCount;

    DISABLE_RAM;
}
Important Note: It’s not necessarily bad to keep access to the SRAM/FRAM enabled. In the word’s of Toxa, “It’s just precautious”. While there are other ways to use it (not discussed in this tutorial), disabled SRAM/FRAM is write-protected. This means, when it’s disabled, bugs in your code or game crashes will not spoil the data.
Checking for Saved Data
Unlike modern Game Development engines, the Game Boy has no concept of “null” or “undefined” values. All allocated RAM (on cartridge, and/or on device) variables will have SOME sort of value. If not explicitly specified, then that value will be random.
To check for a valid, existing save file we’ll create one or two additional bytes in SRAM/FRAM. When we save the game, we’ll give these bytes very specific values. Later, we can check if an save file already exists by looking for that specific value.
In our demo code, we have a 16-bit variable in SRAM/FRAM called ‘savedCheckFlag1‘. When it’s value is 12345, we’re confident we have valid saved data.
NOTE: There is still room for error. There’s a tiny chance, when there was no save data in SRAM/FRAM, that those FRAM/SRAM bytes would randomly have that value. But, with a 16-bit variable, that’s a 0.0015% chance. So we don’t need to worry about that.
uint8_t HasExistingSave(void){

    uint8_t saveDataExists = FALSE;

    ENABLE_RAM;

    /**
     * @brief Check for a specific value on the 'savedCheckFlag1' variable. RAM variables (on cartridge or on the handheld), will
     * always have SOME sort of value. If no save file exists, all the FRAM/SRAM variables will have random values. When we save the game
     * we'll set the 'savedCheckFlag1' variable to a very specific value. This let's us know later, that we have a valid save file.
     *
     */
    saveDataExists = savedCheckFlag1==12345;

    DISABLE_RAM;

    return saveDataExists;
}
That’s it! You now have all you need to add Save data to your game. A final reminder: If you’re going to put your game on a physical cartridge, make sure it has FRAM/SRAM (and a battery if using SRAM).


