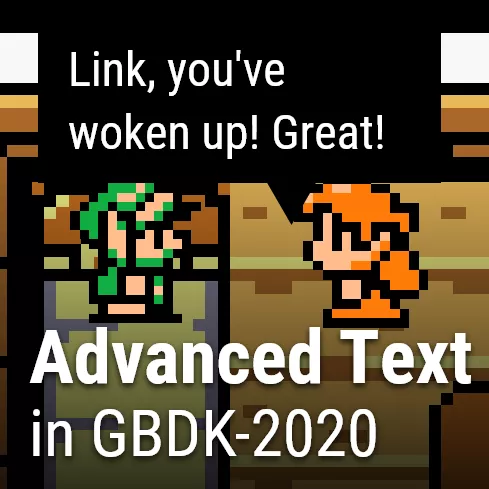
We’re going to build on the previous tutorial Drawing Text in GBDK-2020. The inspiration for this tutorial is the dialogue boxes in The Legend of Zelda: Links Awakening. This is the second tutorial, in a three part tutorial set about drawing text with GBDK. The next tutorial, will involve using a Toxa’s Variable Width Font library.
This version will implement the following features:
- Dynamically populating VRAM to save space.
- Automatic word wrapping
- Pausing for input on periods and question marks
- Zelda-style scrolling effect for large amounts of text.
This tutorial won’t be exactly step-by-step tutorial. More so, it’ll explain the code in my Github repository: Drawing Advanced Dialogue Github Repository.
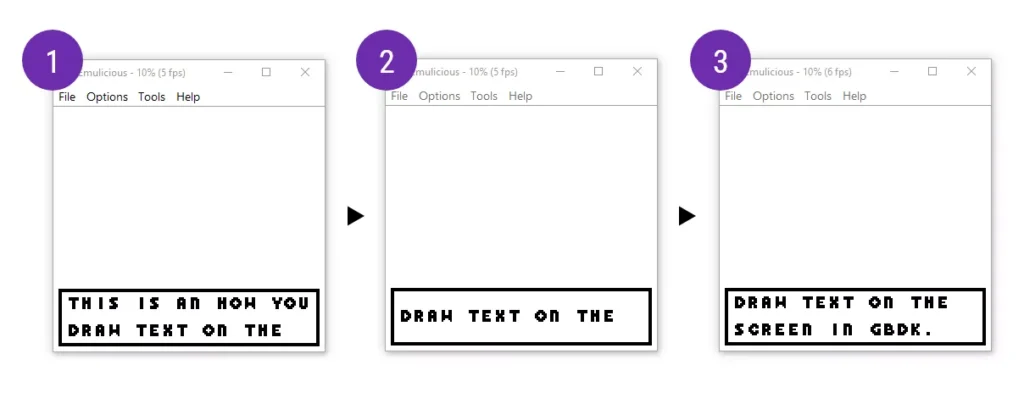
The final result
Our code to call the function:
// We'll pass in one long string, but the game will present to the player multiple pages.
DrawAdvancedDialogue("This is an how you draw text on the screen in GBDK. The code will automatically jump to a new line, when it cannot fully draw a word.  When you reach three lines, it will wait until you press A. After that, it will start a new page and continue. The code will also automatically start a new page after periods. For every page, the code will dynamically populate VRAM. Only letters and characters used, will be loaded into VRAM.");
The above function call, look like this:
Showing & Hiding the Dialogue Box
For drawing & clearing our dialogue box, we’ll use the same function. We’ll draw the dialogue box on the top of the window.
void DrawDialogueBoxOnWin(void){

    set_win_based_tiles(0,0,20,5,DialogueBox_map,1);
}
We track the vertical position of the dialogue box using a variable called ‘windowYPosition’. For smooth movement, this is a scaled integer. When we want to put the dialogue box on screen, we’ll update that variable and move the window to it’s true (non scaled) value.
void SlideDialogueBoxOnScreen(void){

    // The top of the dialogue box should be 5 tiles (the size of our dialogue box) from the bottom of the screen
    int16_t desiredWindowPosition = (DEVICE_SCREEN_HEIGHT<<3)-(DIALOG_BOX_HEIGHT*8);

    while((windowYPosition>>3)>desiredWindowPosition){

        windowYPosition-=10;

        // Update our window position
        move_win(7,windowYPosition>>3);
        vsync();
    }
}

void SlideDialogueBoxOffScreen(void){

    // The top of the dialogue will be be the bottom of the screen, and thus off-screen
    int16_t desiredWindowPosition = (DEVICE_SCREEN_HEIGHT<<3);

    while((windowYPosition>>3)<desiredWindowPosition){

        windowYPosition+=10;

        // Update our window position
        move_win(7,windowYPosition>>3);
        vsync();
    }
}
Dynamically populating VRAM to Save Space
Our text font has a single character per tile. A font that has uppercase letters, lowercase letters, 10 digits, and 10 symbols would require 72 tiles. We could reduce that, by only having uppercase characters, but it would still require 46 tiles.

The more tiles our font uses, the less we have for drawing backgrounds. To optimize our dialogue, instead of adding ALL of our tiles to VRAM at the start, we can instead add each tile to VRAM as we need it.
I created an array called ‘loadedCharacters’. This records where each character is in VRAM:
uint8_t loadedCharacters[Font_TILE_COUNT];During my DrawAdvancedDialogue function, after i get a VRAM tile for a character, i’ll check that array. If it has a value of 255, the character has NOT been loaded into VRAM yet. In that case, i load the character into VRAM, and save where in VRAM i put the tile data.
 uint8_t vramTile = GetTileForCharacter(c);

// If we haven't loaded this character into VRAM
if(loadedCharacters[vramTile]==255){

    // Save where we place this character in VRAM
    loadedCharacters[vramTile]=fontTilesStart+loadedCharacterCount++;

    // Place this character in VRAM
    set_bkg_data(loadedCharacters[vramTile],1,Font_tiles+vramTile*TILE_SIZE_BYTES);

}

// Draw our character at the address
// THEN, increment the address
set_vram_byte(vramAddress++,loadedCharacters[vramTile]);
The Dialogue box we’ll create supports 2 lines of text. Each line can support 16 characters. This means, we’ll support showing 32 unique characters at a given time. So, if we only populate characters that are on screen, we’d never have to use ALL 46 tiles. For example, the sentence: “This is an how you draw text on the screen in GBDK.” uses only 19 unique characters.
Whenever we show the dialogue box, to save space in VRAM, we’ll reset which characters are loaded. We’ll also later do this when starting a new page.
void ResetLoadedCharacters(void){

    loadedCharacterCount=1;

    // Reset everything to 255
    for(uint8_t i=0;i<45;i++)loadedCharacters[i]=255;
}
Automatic Word-Wrapping
Each line in our dialogue box supports 16 characters. More often than not, we’ll reach that limit in the middle of a word. Instead of cutting that word off, we can search ahead and start new lines early.
We only want to start a new line, when we are drawing non alphanumeric characters. This prevents us from cutting a word off. When we find a non-alphanumeric character, we’ll scan ahead for the next. If we reach the end of the row during that time, we need to start a new line.
uint8_t IsAlphaNumeric(char character){

    // Return true for a-z,A-Z, and 0-9
    if(character>='a'&&character<='z')return TRUE;
    else if(character>='A'&&character<='Z')return TRUE;
    else if(character>='0'&&character<='9')return TRUE;

    return FALSE;
}

uint8_t BreakLineEarly(uint16_t index, uint8_t rowSize, char* text){

    char character = text[index++];

    // We can break, if we are at the end of our row
    if(rowSize>=INNER_DIALOGUE_BOX_WIDTH)return TRUE;

    // We DO NOT  break on alpha-numeric characters
    if(IsAlphaNumeric(character))return FALSE;

    uint8_t nextRow=rowSize+1;

    // Loop ahead until we reach the end of the string
    while((character=text[index++])!='\0'){

        // Stop when we reach a non alphanumeric character
        if(!IsAlphaNumeric(character))break;

        // Increase how many characters we've skipped
        nextRow++;
    }

    // Return TRUE if the distance to the next non alphanumeric character, is larger than we have left on the line
    return nextRow>INNER_DIALOGUE_BOX_WIDTH;
}
Starting new Lines & Pages
When we want to start a new line, we increase how many rows we’ve drawn and update our reset the VRAM address we draw to. The new address will be the start of the next row.
Pausing for input on periods and question marks
We want to pause, and wait for input when we draw a period or question mark.
// If we just drew a period or question mark,
// wait for the a button  and afterwards clear the dialogue box.
if( c=='.'||c=='?'){


    WaitForAButton();
    ClearDialogueBox();
    ResetLoadedCharacters();

    rowCount=0;
    columnSize=0;

    // reset for the next row
    vramAddress = get_win_xy_addr(column,row+rowCount);

    // If we just started a new line, skip spaces
    while(text[index]==' '){
        index++;
    }
}
Zelda-style scrolling effect for large amounts of text
If we’ve drawn two rows of text, and we need a new line, we’ll scroll like in Zelda. We’ll shift both rows up twice, delaying for a moment between each shift.
Code-wise, that looks like this:
void ShiftTextRowsUpward(void){

    uint8_t copyBuffer[INNER_DIALOGUE_BOX_WIDTH];

    // Wait a little bit
    vsyncMultiple(15);

    get_win_tiles(1,3,INNER_DIALOGUE_BOX_WIDTH,1,copyBuffer);

    // Clear the inner dialogue box
    fill_win_rect(1,1,INNER_DIALOGUE_BOX_WIDTH,3,0);

    // Draw the line of text one tile up
    set_win_tiles(1,2,INNER_DIALOGUE_BOX_WIDTH,1,copyBuffer);

    // Wait a little bit
    vsyncMultiple(15);

    // Clear the previous line of text
    fill_win_rect(1,2,INNER_DIALOGUE_BOX_WIDTH,1,0);

    // Draw on the first row of our dialogue box
    set_win_tiles(1,1,INNER_DIALOGUE_BOX_WIDTH,1,copyBuffer);
}
we can implement that with our previous function used for automatic word wrapping:
// if we've reached the end of the row
if(BreakLineEarly(index,columnSize,text)){

    rowCount+=2;
    columnSize=0;

    // if we've drawn our 2 rows
    if( rowCount>2){
        ShiftTextRowsUpwards();
        rowCount=2;
    }

    // reset for the next row
    vramAddress = get_win_xy_addr(column,row+rowCount);

    // If we just started a new line, skip spaces
    while(text[index]==' '){
        index++;
    }
}
Combining all the previous parts together, my “DrawAdvancedDialogue” function looks like this:
void DrawAdvancedDialogue(char* text){

    uint8_t column=1;
    uint8_t row=1;


    DrawDialogueBoxOnWin();
    SlideDialogueBoxOnScreen();
    ResetLoadedCharacters();

    uint16_t index=0;
    uint8_t columnSize=0;
    uint8_t rowCount=0;


    // Get the address of the first tile in the row
    uint8_t* vramAddress = get_win_xy_addr(column,row);

    char c;

    while((c=text[index])!='\0'){

        uint8_t vramTile = GetTileForCharacter(c);

        // If we haven't loaded this character into VRAM
        if(loadedCharacters[vramTile]==255){

            // Save where we place this character in VRAM
            loadedCharacters[vramTile]=fontTilesStart+loadedCharacterCount++;

            // Place this character in VRAM
            set_bkg_data(loadedCharacters[vramTile],1,Font_tiles+vramTile*TILE_SIZE_BYTES);

        }

        // Draw our character at the address
        // THEN, increment the address
        set_vram_byte(vramAddress++,loadedCharacters[vramTile]);

        index++;
        columnSize++;

        // If we just drew a period or question mark,
        // wait for the a button  and afterwards clear the dialogue box.
        if( c=='.'||c=='?'){

            WaitForAButton();
            DrawDialogueBoxOnWin();
            ResetLoadedCharacters();

            rowCount=0;
            columnSize=0;

            // reset for the next row
            vramAddress = get_win_xy_addr(column,row+rowCount);

            // If we just started a new line, skip spaces
            while(text[index]==' '){
                index++;
            }
        }

        // if we've reached the end of the row
        else if(BreakLineEarly(index,columnSize,text)){

            rowCount+=2;
            columnSize=0;

            // if we've drawn our 2 rows
            if( rowCount>2){
                ShiftTextRowsUpward();
                rowCount=2;
            }

            // reset for the next row
            vramAddress = get_win_xy_addr(column,row+rowCount);

            // If we just started a new line, skip spaces
            while(text[index]==' '){
                index++;
            }
        }

        // Play a basic sound effect
        NR10_REG = 0x34;
        NR11_REG = 0x81;
        NR12_REG = 0x41;
        NR13_REG = 0x7F;
        NR14_REG = 0x86;

        vsyncMultiple(3);
    }

    SlideDialogueBoxOffScreen();

}
I hope you found some use for this tutorial. If something doesn’t seem right, look at the repo on github: Drawing Advanced Dialogue Github Repository. That might give you a better idea for how things work.