The game boy has 4 channels for playing noises. Each channel is controlled by it’s own set of noise registers. These registers control things like the duration of the sound, the frequency, or the volume. The noises from these 4 channels can be combined to create music. Unfortunately, There is no native support for music with GBDK-2020. Third-Party drivers, like hUGEDriver, are usually used to add support for music.
What is hUGEDriver?
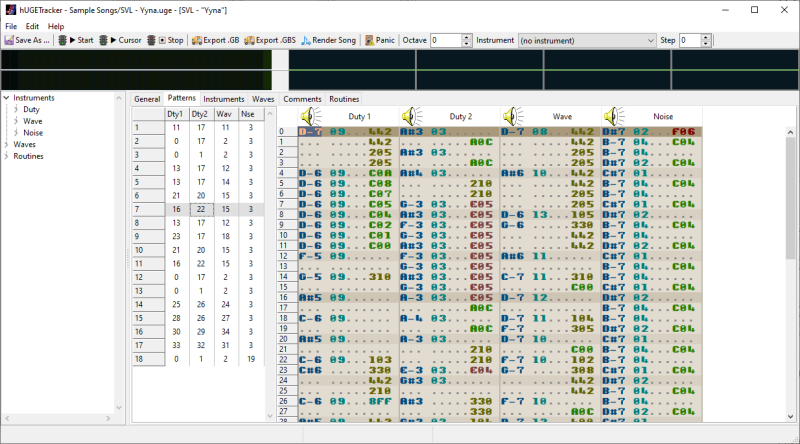
hUGEDriver is a music driver for the Game Boy homebrew games. It supports GBDK, RGBDS, and is even built-in to the GB Studio music player. When added it to your project, It can play music created in hUGETracker, a visual application for creating Game Boy music.
hUGEDriver and hUGETracker are both open source projects, you can find the source code & releases on Github:
- hUGETracker– https://github.com/SuperDisk/hUGETracker
- hUGEDriver – https://github.com/SuperDisk/hUGEDriver
Where to find hUGETracker tutorials?
hUGE Tracker may not be intuitive to most people. If you’re interested in learning hUGE Tracker, you can check out the online manual. You can find some hUGETracker tutorials on GB Studio Central: Getting Started in hUGETracker. You can additionally reach out for help on the hUGETracker discord server.
Don’t want to make your own music?
My example repository has 2-3 songs you can use, already compiled for GBDK usage. The hUGETracker repository also has a bunch of sample songs. You can find them here. If you don’t want to make your own music, or cant; check out Beatscribe.
Beatscribe has composed and produced soundtracks for games on Nintendo Switch, Nintendo DS, PS4, Xbox1, Sega Genesis and numerous Steam, iOs and Android games for over a decade, but his true passion is composing on the classic hardware consoles of his youth.
He’s available for custom commissions of music (from AAA Orchestral to hardware-accurate chiptune) and sound effects. You can reach Beatscribe on Discord @beatscribe or X @beatscribemusic to discuss your project. He also offers some FREE tracks:
- Free FX Hammer SFX Platformer Asset Pack
- Free Gameboy UGE Music Asset Pack
- Free Gameboy Jingles and Fanfares
- Free Megaman Gameboy Level Music
You’ll need to import the .uge file into hUGETracker and export for GBDK
Downloading hUGEDriver
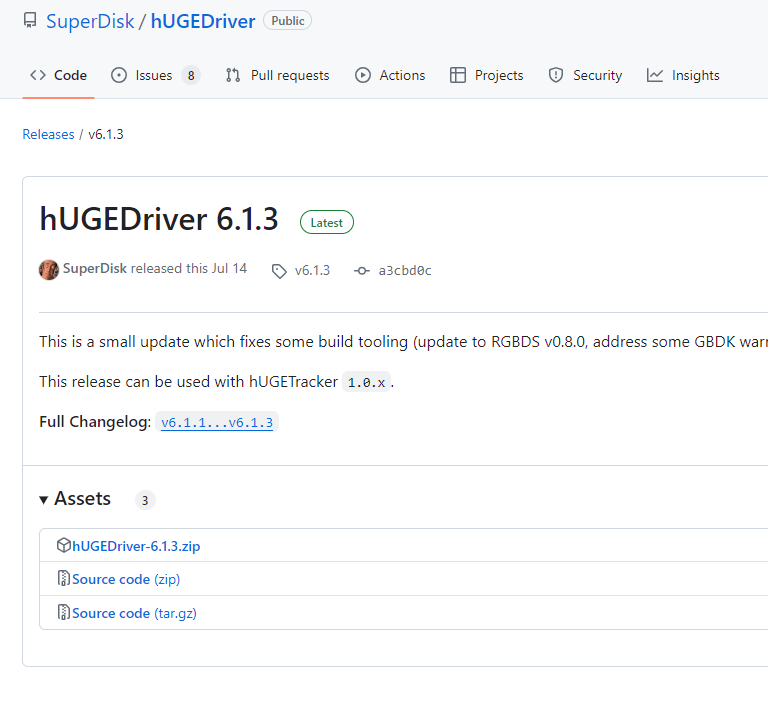
To download hUGEDriver, you can find the latest release on github here. Download the .zip file from the release assets.
Including hUGEDriver in your project
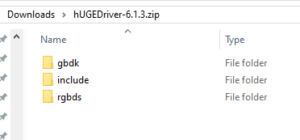
When you download the zip file, you’ll see three folders. You’ll need two them, the ‘gbdk’ and ‘include’ folders, for your GBDK game.
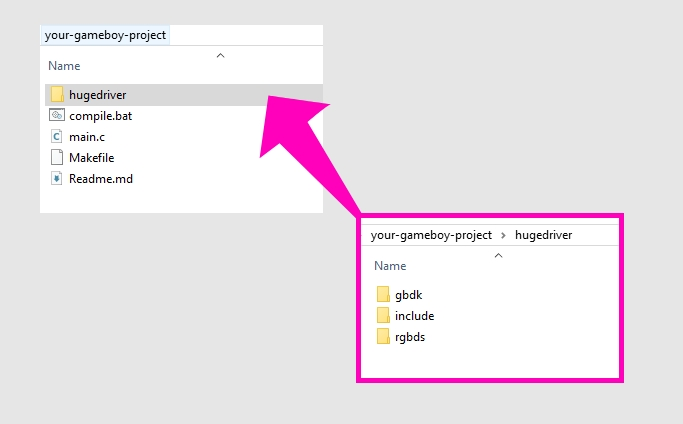
Extract both of those folders into a ‘hugedriver’ folder at the root of your project.
Next, modify your build scripts to include the extracted ‘include’ folder using an ‘-I’ argument. Also, link the hugedriver gbdk library using a ‘-Wl-l’ argument.
/path/to/gbdk/bin/lcc.exe -Ihugedriver/include -Wl-lhugedriver/gbdk/hUGEDriver.lib -o MyGame.gb main.c If you are using VS Code and it’s C/C++ extension, add the include folder to the includePath in your c_cpp_properties.json file. You can learn more about using VS Code with GBDK here: Setting up Visual Studio Code for making Game Boy Games.
Playing Music in GBDK-2020
First, download the sample_song.c from the hUGEDriver github repo. Add it to your project, next to your other .c files. In your project, include the hugedriver header file:
#include "hUGEDriver.h"If you get errors with this line, make sure you properly passed ‘-Ihugedriver/include’ to lcc, when compiling your files.
Next, declare an external constant for our sample song. This value is created in hUGETracker during the export process.
extern const hUGESong_t sample_song;With that done, make sure sound is enabled in your game. Add the following snippet inside of your ‘void main(void)’ function.
NR52_REG = 0x80; // Master sound on
NR50_REG = 0xFF; // Maximum volume for left/right speakers.
NR51_REG = 0xFF; // Turn on sound fully
Finally, we’ll initiate hUGEDriver with our sample song and add a vertical blank interrupt (VBL) using the hUGEDriver libraries ‘hUGE_dosound’ function.
// the critical tags ensure no interrupts will be called while this block of code is being executed
__critical {

    // Init and use huge drive to play our sample song
    hUGE_init(&sample_song);
    add_VBL(hUGE_dosound);
}
Your final main.c file should look like this:
#include If you compile and run your project, you wont see anything, but you’ll hear music. I recommend the Emulicious Game Boy emulator.
Other Tasks
There’s more to it than just PLAYING the music. Here are some guides on common tasks:
- Playing Sound Effects
- Changing Volume & Fading Music
- Switching Songs
- Pausing hUGEDriver
Playing sound effects with your music
To play sound effects, you need to temporarily stop hugedriver from playing sounds on that channel. You can do this using the ‘hUGE_mute_channel’ function.
// Muge the huge driver sounds for channel 1
hUGE_mute_channel(HT_CH1,HT_CH_MUTE);
With this function call, hUGEDriver will continue, but won’t play sounds on the specified channel. After you stop hUGEDriver from playing music on that channel, you can play a sound effect on it.
After a set amount of frames, you unmute that channel using the same function.
// unmute the previously muted channel
hUGE_mute_channel(HT_CH1,HT_CH_PLAY);
In the below code snippet, when the Start button is pressed. We’ll mute hugedriver on channel 1. After that, we’ll play a basic sound effect using the NR10-NR14 sound registers.
With that effect playing, we’ll use the ‘mutedChannel1Timer’ variable as a counter. When it reaches zero, we’ll unmute hugedriver on channel 1.
More info on playing basic sounds here.
// Loop forever
while(1) {

    joypadPrevious=joypadCurrent;
    joypadCurrent = joypad();

    if((joypadCurrent & J_START)  && !(joypadPrevious & J_START)){

        // Muge the huge driver sounds for channel 1
        hUGE_mute_channel(HT_CH1,HT_CH_MUTE);

        // Play a sound effect on channel 1
        NR10_REG=0X00;
        NR11_REG=0X81;
        NR12_REG=0Xff;
        NR13_REG=0X73;
        NR14_REG=0X86;

        // We'll wait 10 frames before continuing our hugedriver track
        mutedChannel1Timer=10;
    }


    // If the timer is larger than 0, it's active
    if(mutedChannel1Timer>0){

        // Decease the timer until it reaches zero
        mutedChannel1Timer--;

        // If the timer just reached zero
        if(mutedChannel1Timer==0){

            // unmute the previously muted channel
            hUGE_mute_channel(HT_CH1,HT_CH_PLAY);
        }
    }

    // Done processing, yield CPU and wait for start of next frame
    vsync();
}
}
Changing your music’s volume
To change the volume you need to edit the NR50_REG and NR51_REG registers.
// soundVolume must be a value between 0 and 7 (inclusive)
// For more Info: https://gbdev.io/pandocs/Audio_Registers.html#ff24--nr50-master-volume--vin-panning
// bit's 6, 5, and 4 are the left volume
// bit's 0, 1, and 2 are the right volume
// |       |      7     |   6  5  4    |     3      |   2  1  0    |
// | NR50  |  VIN left  | Left Volume  | VIN right  | Right VOlume |
NR50_REG = AUDVOL_VOL_LEFT(soundVolume) | AUDVOL_VOL_RIGHT(soundVolume); // a value of zero will still be audible
NR51_REG = soundVolume!=0 ? 0xFF:0; // turn sound off fully if our volume is zero
The NR50_REG register controls the volume for the left and right speakers. You can find more information on that here, in the Game Boy Pan Docs.
The NR51_REG register controls the master volume. We’ll set it to zero or max-value (255 of 0xFF). Depending on if the music should be fully-muted or not, respectively.
To smoothly fade your music, you can use scaled integers. the NR50_REG accepts a value of 0-7 for the volumes on each side. When 0, a tiny bit of sound is still playing. To fix that, we can change NR51_REG’s value. The right speakers volume should be the three most insignificant bits of the NR50_REG register. The left speakers volume should be the 6th, 5th, and 4th least significant bits.
void UpdateAudioVolume() NONBANKED{

    uint8_t nonShiftedSoundVolume;

    // If were not changing sounds
    if(!muteMusic){

        // Incease our sound volume while it's below 7 (7 is the maximum volume)
        if((soundVolume>>4)<7){
            soundVolume++;
        }

    // Otherwise, if we are changing sounds
    }else {

        // Decrease the sound volume while it's above 0
        if((soundVolume>>4)>0){
            soundVolume--;
        }
    }

    nonShiftedSoundVolume = (soundVolume>>4);

    // nonShiftedSoundVolume should be a value from 0-7
    if(nonShiftedSoundVolume>7)nonShiftedSoundVolume=7;

    // For more Info: https://gbdev.io/pandocs/Audio_Registers.html#ff24--nr50-master-volume--vin-panning
    // bit's 6, 5, and 4 are the left volume
    // bit's 0, 1, and 2 are the right volume
    // |       |      7     |   6  5  4    |     3      |   2  1  0    |
    // | NR50  |  VIN left  | Left Volume  | VIN right  | Right VOlume |
    NR50_REG = AUDVOL_VOL_LEFT(nonShiftedSoundVolume) | AUDVOL_VOL_RIGHT(nonShiftedSoundVolume); // a value of zero will still be audible
    NR51_REG = nonShiftedSoundVolume!=0 ? 0xFF:0; // turn sound off fully if our volume is zero
}
Pausing & UnPausing your music
To Pause the Music, you need to do 2 things:
- remove your ‘hUGE_dosound’ VBL interrupt handler.
- mute all 4 sound channels
Removing the VBL interrupt handler ensures the driver stops the progression of the audio track. Muting the channels prevents any sound channels from staying on.
// the critical tags ensure no interrupts will be called while this block of code is being executed
// Remove the vertical blank interrupt used to play the msuci
__critical {
    remove_VBL(hUGE_dosound);
}

// Mute each channel
hUGE_mute_channel(HT_CH1,HT_CH_MUTE);
hUGE_mute_channel(HT_CH2,HT_CH_MUTE);
hUGE_mute_channel(HT_CH3,HT_CH_MUTE);
hUGE_mute_channel(HT_CH4,HT_CH_PLAY);
To UnPause the Music, do the opposite. Re-Add the VBL Interrupt handler. And unmute each channel
// the critical tags ensure no interrupts will be called while this block of code is being executed
// Re add the vertical blank interrupt to play the music
__critical {
    add_VBL(hUGE_dosound);
}

// Unmute each change
hUGE_mute_channel(HT_CH1,HT_CH_PLAY);
hUGE_mute_channel(HT_CH2,HT_CH_PLAY);
hUGE_mute_channel(HT_CH3,HT_CH_PLAY);
hUGE_mute_channel(HT_CH4,HT_CH_PLAY);
Changing Songs
To change switch song is playing, mute all the channels and re-init hUGEDriver with the new song.
// Mute each channel
hUGE_mute_channel(HT_CH1,HT_CH_MUTE);
hUGE_mute_channel(HT_CH2,HT_CH_MUTE);
hUGE_mute_channel(HT_CH3,HT_CH_MUTE);
hUGE_mute_channel(HT_CH4,HT_CH_MUTE);

// Sample song is in bank 0
// No bank switching needed, bank 0 is always active
hUGE_init(&next_song);NOTE: If your songs are in different banks, you’ll need to switch banks BEFORE calling ‘hUGE_init’ with the new song. Make sure you do this in a NONBANKED function, and that you switch back to the previous bank when done. More info in my tutorial on banking.
Playing music in different banks
As your game grows, you’ll want to organize your music into different banks. To play music in different banks, we won’t directly use ‘hUGE_dosound’ as our VBL interrupt handler. Instead, we’ll create a function that switches to the proper bank before calling ‘hUGE_dosound’.
// It's important this function be NONBANKED
// That'll garuantee it's placed in the fixed Bank 0
void PlaySoundVBL(void) NONBANKED{

    uint8_t _previous_bank = _current_bank;

    // Switch to whichever bank our song is in
    // Not neccessary if the song is in bank 0
    SWITCH_ROM(BANK(song_number2_bankref));

    hUGE_dosound();

    SWITCH_ROM(_previous_bank);
}

void main(void)
{
    NR52_REG = 0x80;
    NR50_REG = 0xFF; // Max volume for left/right speakers.
    NR51_REG = 0xFF; // Turn on sound fully

    // the critical tags ensure no interrupts will be called while this block of code is being executed
    __critical {

        // Switch ROM bank BEFORE!!! starting a song in a different bank
        SWITCH_ROM(BANK(song_number2_bankref));
        hUGE_init(&song_number2);

        add_VBL(PlaySoundVBL);
    }

    // Loop forever
    while(1) {

		// Done processing, yield CPU and wait for start of next frame
        vsync();
    }
}
Conclusion
That covers most of it. Be sure to check out my code repo here , for examples. If you want to learn the nitty gritty, as always, check out the Game Boy Pan Docs.